Why Vacuum Mops Smell & How to Fix It Fast
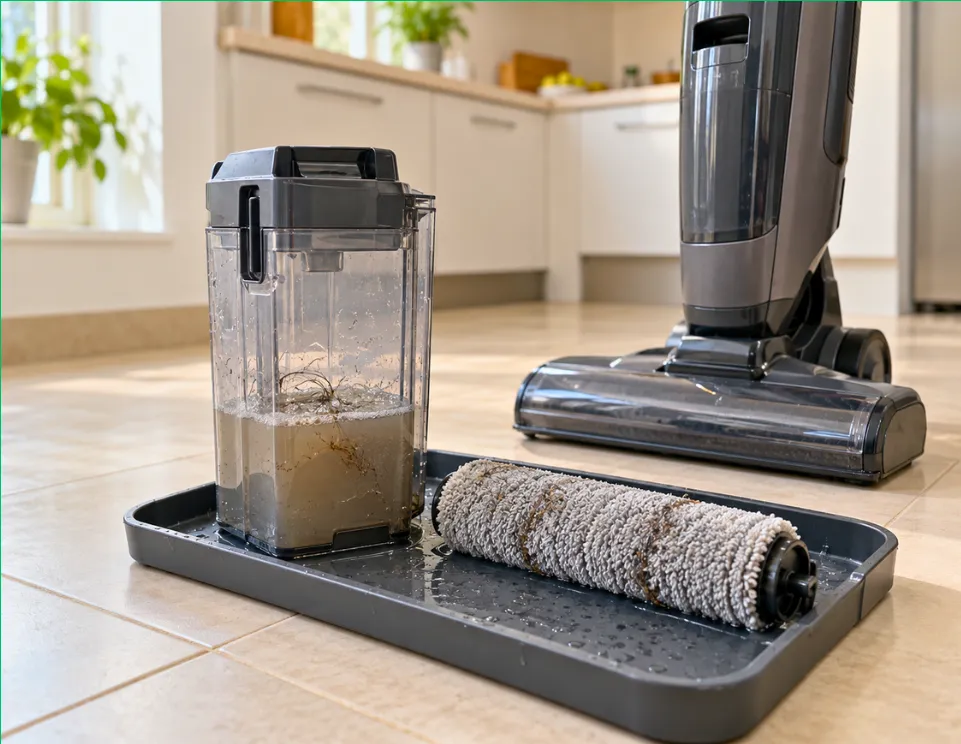

Vacuum mops smell when dirty water, floor residue, and damp components remain inside after cleaning. The dirty water tank is an obvious place to start, but a wet brush roller, clogged debris channel, or neglected filter can keep the odor coming back even after you empty it.
To fix the smell, remove collected waste, run the approved self-cleaning cycle if fitted, then clean and fully dry the washable parts. Check the tank lid, roller housing, and storage tray as well. Emptying the water alone can leave wet debris behind.
You can start removing the source right away. Getting the machine ready to use again may take longer because filters and rollers need adequate drying time.
This guide covers wet-dry vacuum mops, also called hard-floor washers, with reusable rollers and separate clean- and dirty-water tanks. Disposable-pad cleaners and robot mop stations have different maintenance procedures. If you are comparing floor washers, see our guide to the best wet-dry vacuums.
Find Where the Smell Is Coming From
Before removing components, switch the machine off and unplug it or disconnect it from its charger. Inspect the removable parts without leaning close to dirty surfaces to smell them.
| Where the odor is strongest | Check first |
|---|---|
| Around the dirty water tank | Wastewater, lid, strainer, float, and accessible seals |
| Near the floorhead | Brush roller, roller ends, cover, and suction opening |
| Around the parked machine | Storage tray and damp enclosed components |
| Only while the machine runs | Roller, filter, recovery tank, and accessible debris channel |
| On the floor after mopping | Roller cleanliness, solution dosage, and the affected floor area |
Odor provides a clue, not a confirmed diagnosis. A musty smell does not prove mold, and a sewage-like smell does not identify a particular microorganism.
How to Fix Vacuum Mop Smell Fast
Check your model’s care instructions before starting. Confirm which components are washable, the permitted water temperature and cleaning agents, and the required drying time. Keep the motor housing, charger, and electrical connections dry.
1. Empty the dirty water tank
Remove the recovery tank and separate collected hair and solids for disposal rather than washing them down a drain. Empty the wastewater according to the manufacturer’s instructions and local disposal guidance.
Clear the strainer and any obvious blockage. If the tank is full, do this before attempting a self-cleaning cycle.
2. Run self-cleaning before the final hand-clean
If your machine has a self-cleaning function, set it up with the correct water level, solution, and dock arrangement. All required parts must be installed correctly, including a serviceable filter in the condition specified by the manual. Do not reinstall a freshly washed filter while it is still wet just to run the cycle.
Once the cycle finishes, empty the recovery tank again. The rinse has carried more dirty water into it. BISSELL specifically instructs CrossWave OmniEdge owners to empty this water to reduce odor buildup.
If your model has no self-cleaning function, continue with its manual cleaning procedure.
3. Clean the tank, lid, and separator
Switch off and disconnect the machine again before disassembly. Remove the user-serviceable tank parts and rinse those approved for washing.
Use the supplied cleaning tool or a suitable soft brush to loosen visible residue in corners, lid grooves, and the debris separator. Check the underside of the lid rather than stopping once the clear container looks clean.
Do not force apart the float mechanism or remove seals that are intended to stay in place. If a cleaning agent is permitted for a detached component, rinse it away as directed before drying.
4. Wash the roller and clear the cleaning head
Remove the brush roller and cover where the design allows it. Clear hair from both ends and wash the roller using the specified method.
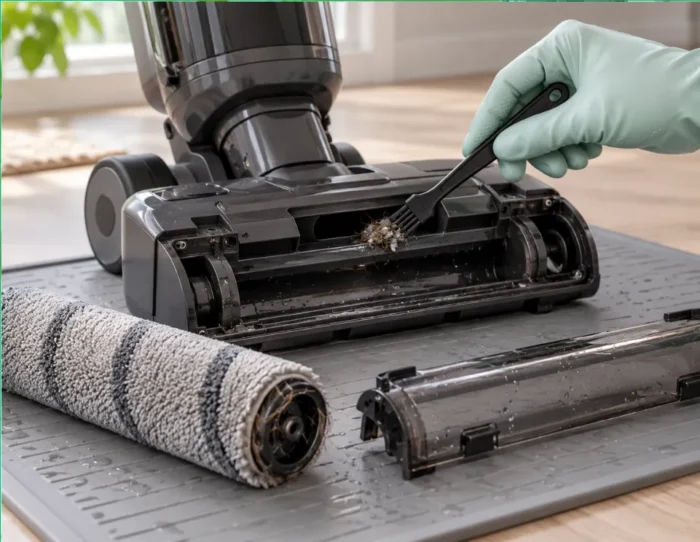 Inspect the roller ends and accessible debris opening during cleaning.
Inspect the space beneath the cover and the accessible suction opening. Remove wet clumps with the recommended tool, then wipe the housing as directed. Avoid pouring water into the machine or pushing tools into sealed internal passages.
This step matters when the tank smells clean but the odor returns as soon as the roller gets wet.
5. Clean the filter according to its material
Not every filter is washable. Rinse only those identified as washable, using the approved method, and allow the full drying time before reinstallation.
BISSELL specifies 24 hours of filter drying for the CrossWave and CrossWave Pet Pro models covered by its tank-cleaning guide. Your machine may have different requirements, so use its instructions rather than assuming a quick surface dry is enough.
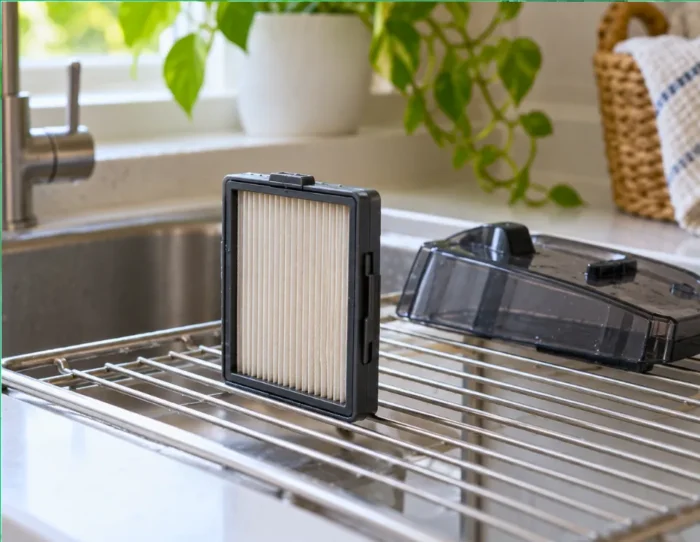 Wash only filters identified as washable, then follow the specified drying time.
6. Dry the parts and clean the tray
Place washable components in their designated drying positions with room for airflow. Use the built-in roller-drying function if fitted, following its operating instructions.
Check the tank lid, strainer, and filter separately. A roller-drying cycle does not establish that every other component is dry.
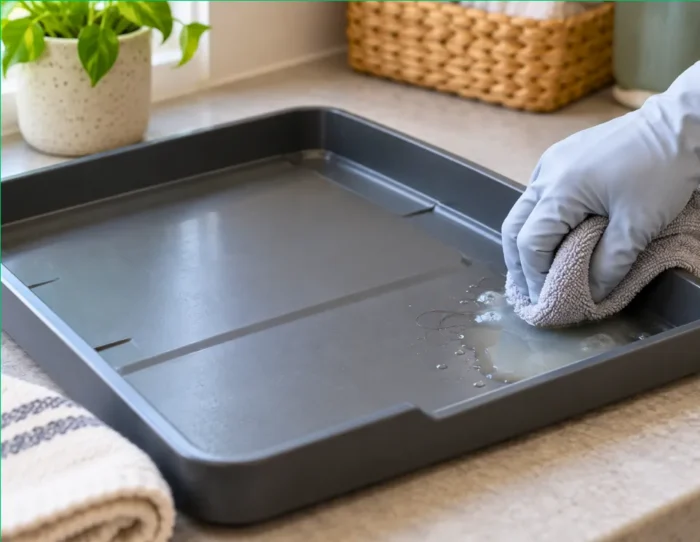 Remove residue from washable tray sections and keep charging components dry.
Finish with the storage tray. Clean its washable sections, wipe any permitted surfaces, and reassemble the machine only when the parts meet the manufacturer’s drying requirements.
Can You Use Vinegar or Baking Soda to Remove the Smell?
Use either only if the manufacturer explicitly approves it for the exact application. There is no universal vinegar recipe suitable for every vacuum mop.
The same distinction applies to other cleaners: a product permitted for hand-washing a detached tank may be unsuitable for circulation through the machine.
| Product or method | What to do |
|---|---|
| Vinegar | Check explicit approval before using it on parts or in the tank |
| Baking soda | Avoid adding powder or homemade mixtures to the fluid system |
| Dish soap | Use only where permitted for detached parts; do not assume it belongs in the clean-water tank |
| Bleach or disinfectant | Use only if expressly allowed for that purpose; never mix chemicals |
| Extra floor-cleaning formula | Follow the prescribed dose instead of adding more to cover an odor |
Tineco warns that third-party solutions can produce excessive bubbles in the iFloor 3 and advises against bleach because it could damage the machine. Stronger or more fragrant cleaner is not a substitute for removing trapped waste.
How to Prevent Vacuum Mop Odor
After each cleaning session, complete the machine’s cleanup before putting it away:
- Empty collected waste and run self-cleaning if fitted, in the prescribed order.
- Empty the wastewater left by that cycle.
- Clean the roller, tank components, and accessible debris areas as directed.
- Dry the washable parts properly and wipe the storage tray.
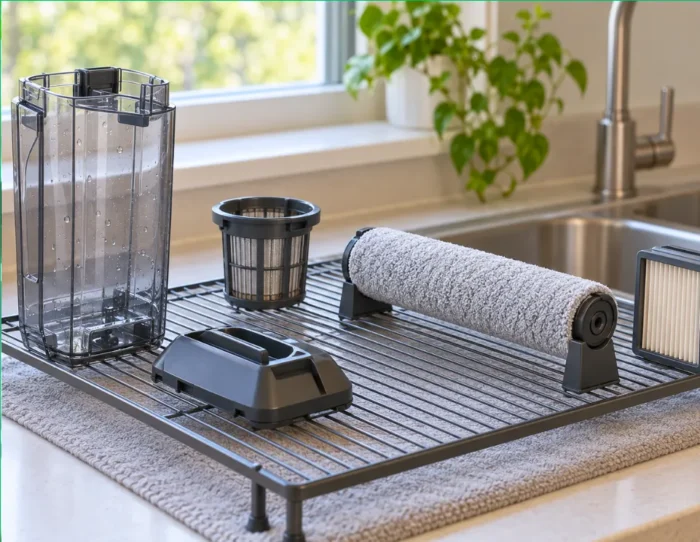 Give washable parts space to dry before reassembling the machine as directed.
For small piles of dry crumbs, a separate dry vacuum lets you clean up without wetting the floor washer’s roller. Our best handheld vacuums guide is useful if you want a compact companion for these jobs. Use a dry-only handheld for dry debris, never liquid spills.
Give the roller ends and tank lid a closer inspection after collecting food spills or a lot of hair. Follow the maintenance schedule for your model, with additional attention when visible debris remains.
For longer storage, follow the instructions for emptying tanks, drying components, and battery care. Avoid leaving an enclosed, damp machine waiting for its next use.
Does Self-Cleaning Disinfect a Vacuum Mop?
Self-cleaning does not automatically mean disinfection. A cycle that rinses the roller is not proof that the whole machine has been sanitized.
Follow any specific sanitation claim and instructions for your exact model. The dirty water tank and other user-serviceable components still need the maintenance listed in the manual.
Related Vacuum Guides
- Best cordless vacuum cleaners — for comparing cordless dry-cleaning options.
- Best stick vacuums — for comparing stick-format cleaners.
- Best robot vacuums — for comparing automated cleaning options.
Why Vacuum Mops Smell After Use
A vacuum mop brings water into contact with food crumbs, grease, tracked-in dirt, and hair. It collects the resulting mess in its recovery tank, while some residue can remain around the roller and cleaning head.
Leftover organic material can produce odors as microorganisms break it down. Moisture that lingers in enclosed parts helps the problem persist. The amount of debris, storage conditions, and drying all affect when a smell becomes noticeable; there is no fixed number of hours that applies to every machine.
Dirty water and residue in the tank
Pouring out the wastewater removes much of the mess, but it does not necessarily clean the tank. Hair can collect in the strainer, sludge can stick beneath the lid, and residue can remain around accessible seals or the float assembly.
If the container looks clean but still smells, inspect the parts above the waterline. They are easy to overlook during a quick rinse.
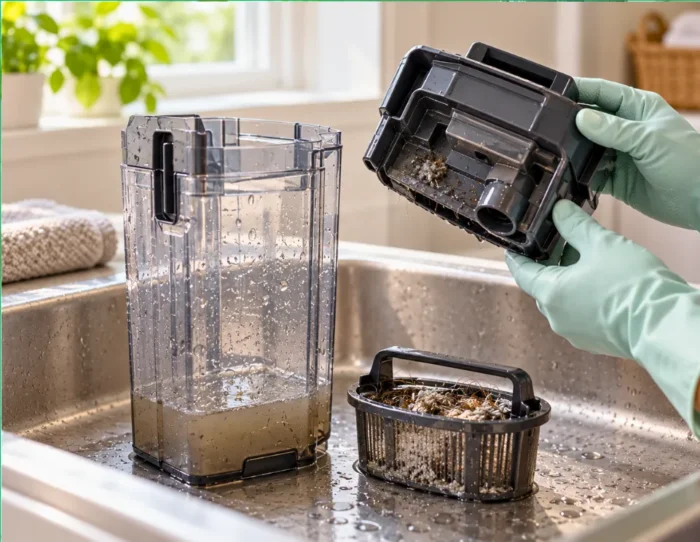 Check the strainer and underside of the lid, even after emptying the tank.
A damp or dirty brush roller
The brush roller touches the floor throughout cleaning. Residue can remain within its fibers, around the ends, or beneath the brush cover.
Putting a rinsed roller straight back into an enclosed head may leave it damp between sessions. A sour smell near the floor is a reason to inspect both the roller and its housing.
If shedding is a recurring cleanup problem, our guide to the best vacuums for pet hair covers options for a separate dry-cleaning routine. Collecting loose fur first can reduce what enters the wet roller, but it does not replace cleaning the floor washer afterward.
Debris in the filter or suction opening
Depending on the model, the recovery tank may contain a filter, mesh screen, or separator. The debris channel—the accessible passage that carries collected mess away from the cleaning head—can also hold wet hair and dirt.
Tineco’s FLOOR ONE S6 MASTER odor troubleshooting identifies the dirty water tank, filter, brush roller, and debris channel as areas to clean. A spotless tank does not rule out a problem elsewhere along that path.
A dirty storage tray
Lift the machine and look underneath it. Water and debris left on the tray can make the storage area smell even after the tank has been washed.
Clean the tray as directed, keeping moisture away from charging contacts. Only remove and rinse sections that the manufacturer identifies as washable.
Why Does the Smell Return When You Start Cleaning?
A machine can smell fairly normal while parked, then release an odor during use. Wetting and moving a dirty roller can make leftover residue more noticeable, while airflow carries odor from the recovery system.
That is a reason to revisit the roller, tank lid, filter, and accessible debris channel. It does not automatically mean the motor or every internal water line is contaminated.
If those parts are clean and dry but the smell persists, check the clean-water tank too. Empty old contents and inspect the removable tank and cap for residue, cleaning them only as directed. Refill with fresh water and the correct formula when you next use the machine.
Also consider the floor itself. If one area smells but the cleaned machine does not, investigate that patch separately. A spill that has reached a flooring joint may need treatment beyond another pass with the vacuum mop.
When Cleaning Is Not Enough
After washing and complete drying, inspect the components separately. If one roller or filter still has a persistent odor, follow the manufacturer’s replacement guidance for that part.
Replace damaged components as directed as well. A torn filter, deteriorating roller, cracked tank, or poorly seated seal needs attention even if another rinse temporarily improves the smell. Buy replacements matched to the exact model.
If you are considering replacing the entire machine, first decide whether you need floor washing, dry vacuuming, or both. Our guide to the best vacuum cleaners brings the broader choices together.
Contact support if the odor returns immediately despite correct maintenance, especially when accompanied by leaks, unusual noise, or reduced pickup. Explain when the smell appears and which parts you have cleaned. Avoid opening sealed assemblies without service instructions.
A burning or electrical smell requires a different response. Stop using the machine, switch it off, and disconnect power if safe. Do not run another self-cleaning cycle to investigate it, particularly if you notice smoke, unusual heat, or charger damage.
Engr. Hm Jamal
Founder & Lead Technical EditorFounder of Wits Engineer, with a practical background in electrical and water systems. His product reviews focus on setup, performance, maintenance and the trade-offs that affect everyday ownership.